How sharp is a monochrome converted camera?
This page will demonstrate the difference between using a color camera to produce B&W images, or producing them directly from a monochrome converted camera . If you want to produce a great B&W image, it’s best to forgo the color portion of the image capture process and use a converted camera.
Below are images taken in succession using two Sony a7’s. The first two images are the same image taken with a color a7 (the second image is the color image desaturated in LR), and the last two were taken using the monochrome a7(m) with and without an IR cut filter. This camera is a full spectrum converted camera; meaning that there are no filters over the sensor. The original color image is shown at left. Please take into consideration that most all lenses are sharpest near their center. But the sample here is taken from near the edge of the frame. And yet, it still resolves quite well the details in the image.
The same lens was used for all images, and set to the same f-stop and the focal length was locked in place. A Nikon 50mm 1:1.2 set to ƒ8 was used on both cameras. Shutter speed was changed to achieve equal exposures of +1 EV indicated in the histogram. This setting maximizes exposure without clipping—ETTR. Equal sharpening was applied in post processing for all images. No other enhancements or adjustments were used on the images. Download any of the RAW files with the links below.
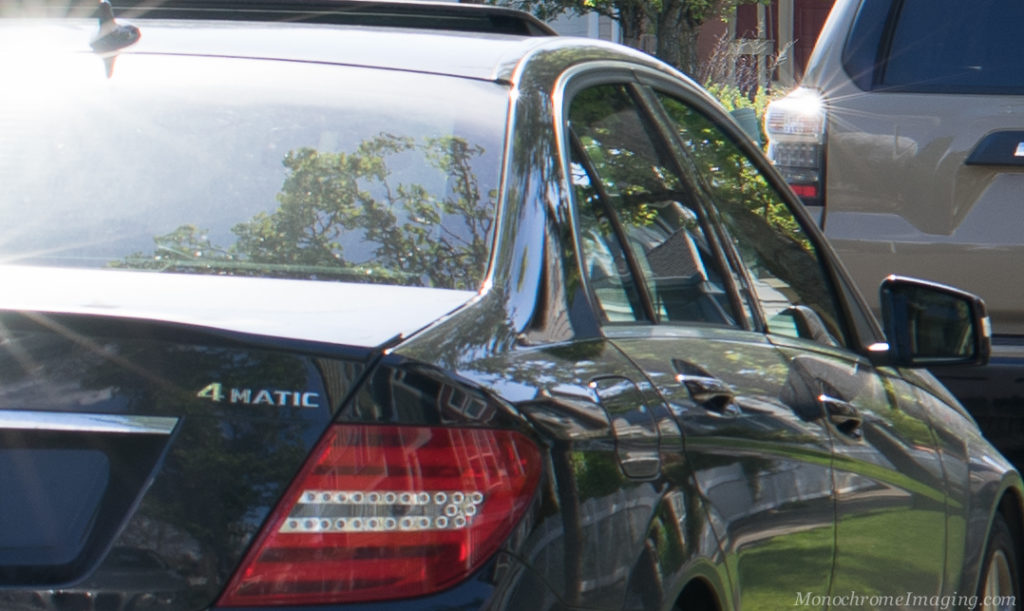
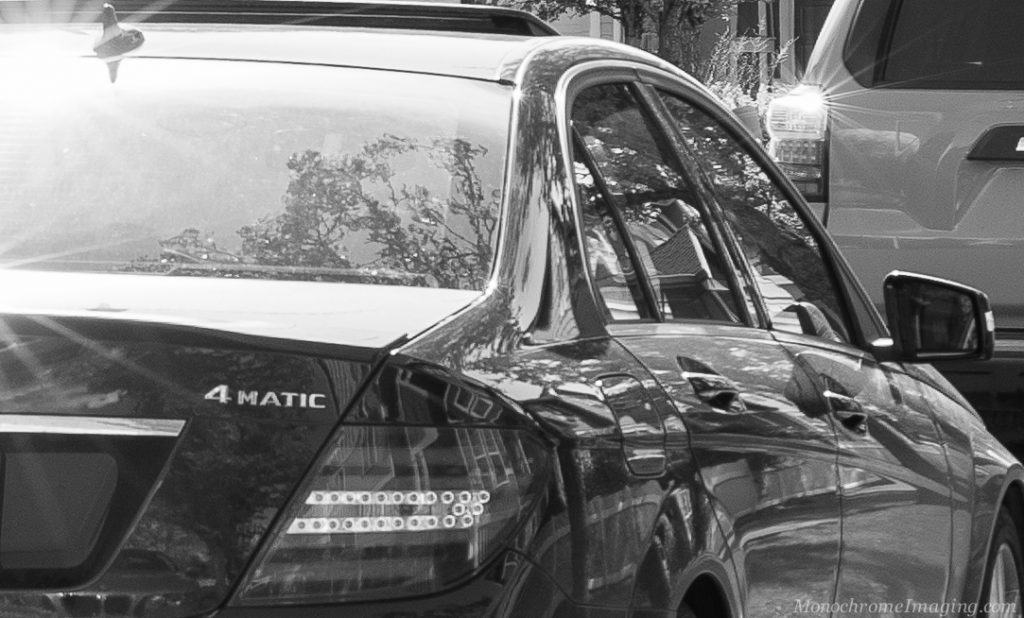
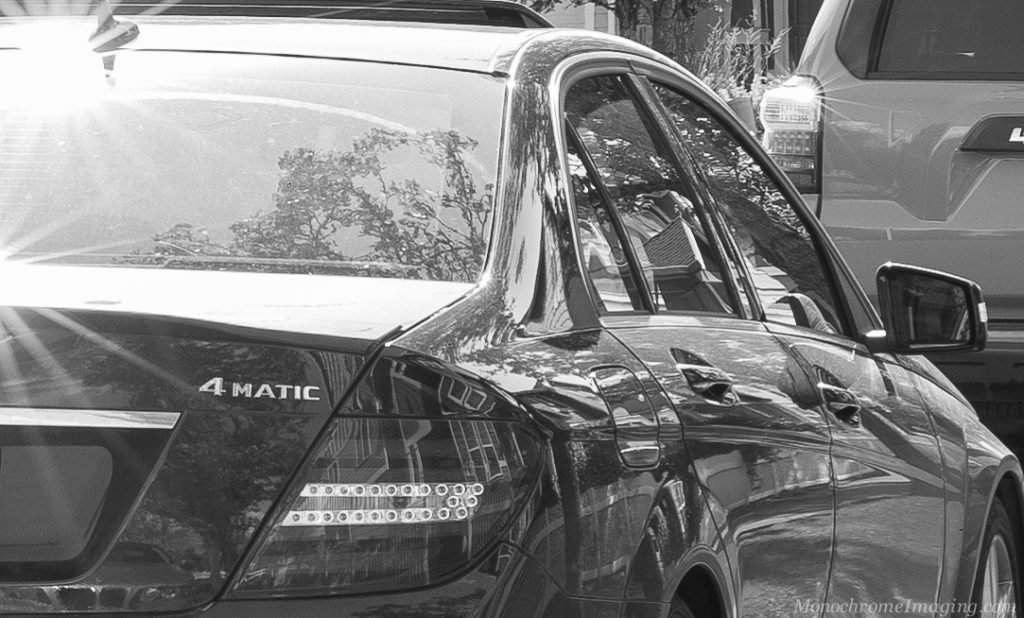
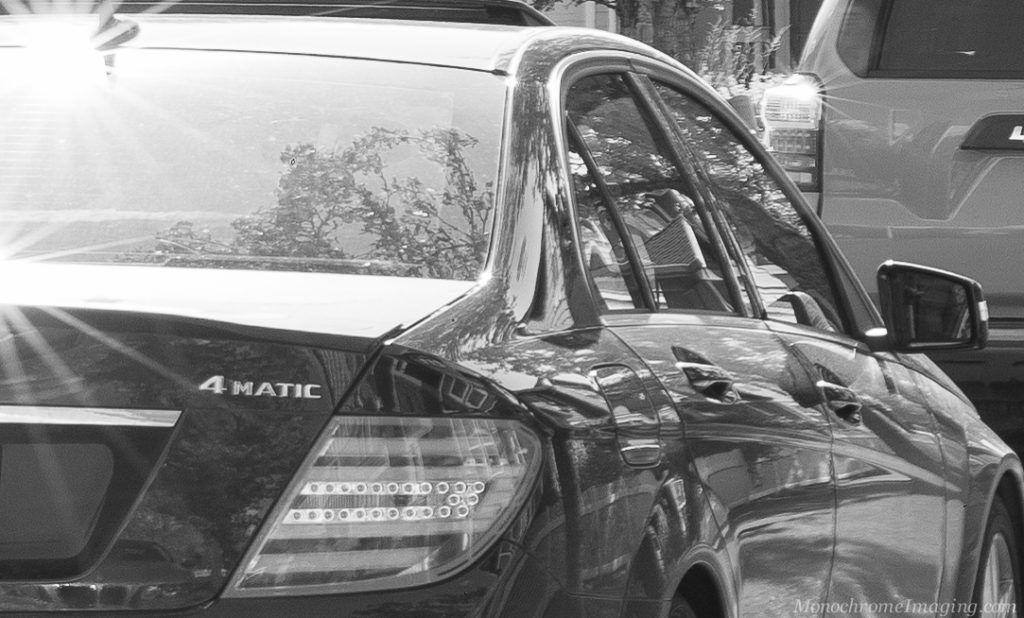
Take note of the reflections in the side window of the car. There is a reflection of a roof with standard roof tiles. You can see the tiles in the monochrome converted images, but not in the desaturated color image—and forget the color image, it’s just muddy. The reflection of the tree off of the rear window has more detail also. Now imagine the results if I were using the a7R(m). I used the a7(m) for this test because it mimics the Leica Monochrome in resolution and sensor size. The a7 is a prime candidate for monochrome conversion and is reasonably priced on the used market.
Why does the image without the IR cut filter look fuzzier?
The extra IR light is what causes the loss of resolution, as in the last image. The cause for this is that the IR light does not focus at the same focal plane on the sensor as does the Visible light due to the limitations of the lens’ design and its coatings—it was designed to focus visible light. This effect is a form of aberration, chromatic aberration, and occurs when a lens attempts to focus all colors (wavelengths) onto one imaging plane. By limiting the wavelength range entering the optical system with an IR cut filter, significant resolution improvements can be made using a conventional lens. General rule here is to use an IR cut filter when there is a large amount of IR light present, such as during a bright sunny day as pictured in the examples above. When shooting indoors, at night or with flash, you can leave off the IR cut filter and gain extra sensitivity.
There is no trickery here; these are the actual image files. You can download the unaltered RAW files to inspect by clicking the links above.